

when we leave the eu can i trade binary options
Contents
- How to open a Binance Futures business relationship
- How to fund your Binance Futures account
- Binance Futures interface guide
- How to adjust your leverage
- What is the deviation between Marking Toll and Concluding Price?
- What order types are available and when to utilize them?
- How to use the Binance Futures calculator
- How to use Hedge Style
- What is the Funding Rate and how to check information technology?
- What is Post-Merely, Fourth dimension in Force, and Reduce-Only?
- When are your positions at risk of getting liquidated?
- What is automobile-deleveraging, and how tin it affect yous?
- Closing thoughts
Earlier opening a Binance Futures account, you need a regular Binance account. If you don't have ane, you can go to Binance and click on Register in the top right corner of your screen. Then follow these steps:
- Enter your email accost and create a prophylactic countersign. If you have a referral ID, paste it into the referral ID box. If you don't have 1, you can use our referral link to get a ten% discount on spot/margin trading fees.

- When you are set up, click on Create account.
- You lot will receive a verification electronic mail shortly. Follow the instructions in the electronic mail to complete your registration.
Next, log in to your Binance account, motility your mouse to the bar at the top of the folio, and click on USD(S)-M Futures.

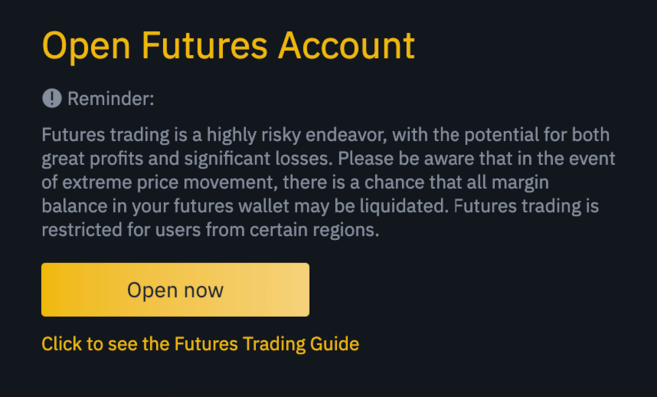
Click on the Open up now button to actuate your Binance Futures business relationship. And that's it. Yous're set to merchandise!
Yous may also refer to the Binance Futures FAQ to get an overview of the contract specifications.
If you'd like to test out the platform without risking existent funds, you can try out the Binance Futures testnet.
You can transfer funds back and forth between your Exchange Wallet (the wallet that you use on Binance) and your Futures Wallet (the wallet that yous utilize on Binance Futures).
If you don't take any funds deposited to Binance, we recommend reading How to Deposit on Binance.
To transfer funds to your Futures Wallet, click on Transfer on the correct side of the Binance Futures page.

Set up the amount that you'd like to transfer and click on Confirm transfer. You should be able to run into the residual added to your Futures Wallet shortly. You tin change the direction of the transfer using the double-arrow icon as seen below.

This isn't the only way to fund your Futures Wallet. You can too use funds in your Exchange Wallet equally collateral and borrow USDT for futures trading from your Futures Wallet Balances page. This way, you don't have to transfer funds directly to your Futures Wallet. You'll, of course, have to pay back the USDT you've borrowed.

i. In this area, you can observe links to other Binance pages, such equally Money-M Futures (quarterly contracts), API Admission, Spot,and Activities.Under the [Information] tab you can detect links to Futures FAQ, funding rate, index price, and other marketplace data.
On the right side of the top bar is where you can admission your Binance account, including your Dashboard. You tin easily cheque your wallet balances and orders beyond the entire Binance ecosystem.
2.This is where you can:
- Choose the contract by hovering over the current contract's proper noun (BTCUSDT past default).
- Check the Mark Toll (important to continue an eye on, equally liquidations happen based on the Marking Price).
- Bank check the expected Funding Charge per unit and a countdown until the adjacent funding round.
- See your electric current chart. You lot tin switch between the Original or the integrated TradingView chart. You'll get a real-time display of the current society book depth by clicking on [Depth].

- Run into alive order volume data. You can conform the accurateness of the order volume in the dropdown carte on the peak right corner of this area (0.01 by default).
- See a live feed of previously executed trades on the platform.

Whenever you see an arrow on the bottom right corner of a module, that means you can move and resize that chemical element. This way, you tin can hands create your own custom interface layout!

iii. This is where yous tin monitor your own trading activity. You lot tin switch between the tabs to check the electric current condition of your positions and your currently open and previously executed orders. You can besides become a full trading and transaction history for a given menstruum.
This is also where you can monitor your position in the automobile-deleverage queue under ADL (important to pay attention to during periods of loftier volatility).
iv. This is where you lot can check your available avails, deposit, and purchase more than crypto. This is besides where y'all can view information relating to the current contract and your positions. Be sure to keep an centre on the Margin Ratio to preclude liquidations.
By clicking on Transfer, you tin transfer funds between your Futures Wallet and the rest of the Binance ecosystem.
5. This is your guild entry field. See our detailed explanation of the available guild types further downwardly in this article. This is as well where you can switch between Cross Margin and Isolated Margin. Adjust your leverage by clicking on your current leverage amount (20x by default).
Binance Futures allows you lot to manually adjust the leverage for each contract. To choose the contract, go to the top left of the page and hover over the current contract (BTCUSDT by default).
To conform the leverage, go to the society entry field and click on your current leverage amount (20x past default). Specify the amount of leverage by adjusting the slider, or by typing information technology in, and click on [Confirm].
It's worth noting that the larger the position size is, the smaller the amount of leverage is that y'all can use. Similarly, the smaller the position size, the larger the leverage you tin can use.
Delight note that using higher leverage carries a higher risk of liquidation. Novice traders should carefully consider the amount of leverage that they employ.
To avoid spikes and unnecessary liquidations during periods of high volatility, Binance Futures uses Terminal Toll and Marking Price.
The Last Toll is like shooting fish in a barrel to sympathize. It ways the Last Toll that the contract was traded at. In other words, the last trade in the trading history defines the Last Price. It's used for calculating your realized PnL (Profit and Loss).
The Mark Price is designed to prevent price manipulation. It's calculated using a combination of funding data and a basket of price data from multiple spot exchanges. Your liquidation prices and unrealized PnL are calculated based on the Mark Price.
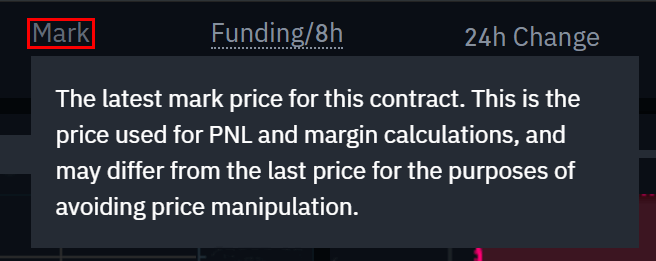
Please notation that the Marking Price and the Last Toll may differ.
When you set an order type that uses a stop cost as a trigger, y'all tin select which toll you lot would like to use equally the trigger - the Last Price or the Marking Cost. To practise this, select the price you wish to utilise in the Trigger dropdown menu at the bottom of the order entry field.
There are many social club types that you tin can use on Binance Futures:
Limit Guild
A limit order is an gild that you place on the club book with a specific limit price. When you place a limit order, the merchandise volition only exist executed if the market place toll reaches your limit price (or ameliorate). Therefore, you may use limit orders to buy at a lower price or to sell at a higher price than the current market place price.
Market Order
A market order is an order to buy or sell at the best bachelor current toll. Information technology is executed against the limit orders that were previously placed on the society book. When placing a market place order, yous will pay fees every bit a market taker.
Stop Limit Order
The easiest style to sympathize a stop-limit guild is to break information technology downwards into finish cost, and limit price. The cease price is merely the price that triggers the limit lodge, and the limit price is the price of the limit gild that is triggered. This means that in one case your terminate price has been reached, your limit order volition be immediately placed on the order book.
Although the stop and limit prices can be the same, this is not a requirement. In fact, it would be safer for you to set the terminate price (trigger toll) a bit higher than the limit price for sell orders, or a flake lower than the limit price for buy orders. This increases the chances of your limit order getting filled after the stop price is reached.
End Market Order
Similar to a stop-limit order, a end marketplace gild uses a end price equally a trigger. Nonetheless, when the terminate toll is reached, it triggers a market place order instead.
Take Turn a profit Limit Social club
If you sympathize what a stop-limit society is, you lot will easily understand what a have-profit limit order is. Similar to a terminate-limit order, it involves a trigger price, the cost that triggers the order, and a limit price, the price of the limit society that is then added to the club book. The key difference between a stop-limit lodge and a take turn a profit limit social club is that a take turn a profit limit order tin can only be used to reduce open up positions.
A have profit limit gild can be a useful tool to manage hazard and lock in turn a profit at specified toll levels. Information technology can too exist used in conjunction with other society types, such as finish-limit orders, allowing you to take more command over your positions.
Please note that these are not OCO orders. For instance, if your stop-limit order is hitting while yous also have an active take profit limit order, the take profit limit order remains active until you manually cancel information technology.
You can set up a take profit limit lodge under the Stop Limit option in the order entry field.
Take Profit Market Social club
Like to a take-profit limit order, a take-turn a profit market society uses a stop price as a trigger. However, when the finish price is reached, information technology triggers a market gild instead.
You lot can set a take-profit marketplace order under the Stop Market place option in the gild entry field.
Abaft Stop Order
A trailing finish order helps y'all lock in profits while limiting the potential losses on your open positions. For a long position, this ways that the trailing finish will move up with the price if the price goes upwardly. Even so, if the cost moves downward, the trailing end stops moving. If the price moves a specific percentage (called the Callback Rate) in the other direction, a sell society is issued. The same is truthful for a short position, just the other fashion round. The trailing stop moves downwards with the market place but stops moving if the market starts going up. If the price moves a specific percentage in the other direction, a buy order is issued.
The Activation Cost is the price that triggers the abaft stop order. If you don't specify the Activation Price, this will default to the current Final Cost or Mark Price. You can set which price it should use every bit a trigger at the bottom of the order entry field.
The Callback Rate is what determines the percentage amount the abaft cease will "trail" the price. So, if you set the Callback Rate to i%, the trailing stop will keep following the toll from a one% distance if the merchandise is going in your direction. If the toll moves more than than 1% in the opposite management of your trade, a buy or sell guild is issued (depending on the direction of your trade).
Video tutorial available here.
You tin find the figurer at the top of the order entry field. It allows y'all to calculate values before entering either a long or a brusque position. Yous can adjust the leverage slider in each tab to utilise it every bit a basis for your calculations.
The calculator has three tabs:
-
PNL – Use this tab to calculate your Initial Margin, Profit and Loss (PnL), and Render on Equity (ROE) based on intended entry and exit toll, and position size.
-
Target Price – Use this tab to calculate what cost you'll need to leave your position at to reach the desired percent render.
-
Liquidation Cost – Use this tab to calculate your estimated liquidation cost based on your wallet balance, your intended entry price, and position size.
In Hedge Mode, you tin hold both long and short positions at the aforementioned fourth dimension for a unmarried contract. Why would you lot want to do that? Well, let's say you're bullish on the price of Bitcoin in the longer term, so you have a long position open. At the aforementioned time, you may want to take quick short positions on lower time frames. Hedge Fashion allows y'all to practise only that – in this case, your quick brusque positions won't affect your long position.
The default position mode is One-Way Style. This ways that you tin can't open up both long and brusk positions at the same fourth dimension for a single contract. If y'all tried to practice it, the positions would cancel each other out. So, if you want to utilise Hedge Mode, you'll need to enable information technology manually. Hither'south how you lot do that.
1. Get to the tiptop correct of your screen and select [Preference].
2. Go to the [Position Manner] tab and select [Hedge Manner].

Please annotation that if y'all have open orders or positions, yous won't be able to adjust your position mode.
The Funding Rate makes sure that the price of a perpetual futures contract stays as shut to the underlying asset's (spot) toll equally possible. Essentially, traders are paying each other depending on their open up positions. What dictates which side gets paid is determined past the difference between the perpetual futures toll and the spot cost.
When the Funding Rate is positive, longs pay shorts. When the Funding Rate is negative, shorts pay longs.
So what does this mean for yous? Well, depending on your open positions and the Funding Rates, you'll either pay or receive funding payments. On Binance Futures, these funding payments are paid every 8 hours. You can bank check the time and the estimated Funding Rate of the next funding period on the meridian of the page, adjacent to Marking Price.
If yous'd like to check the previous Funding Rates for each contract, hover over [Information] and select [Funding Rate History].

When y'all use limit orders, you lot tin set additional instructions along with your orders. On Binance Futures, these can either exist Post-Simply or Fourth dimension in Strength (TIF) instructions, and they make up one's mind boosted characteristics of your limit orders. You can access them at the bottom of the society entry field.
Post-Only means that your gild will always exist added to the order book first and will never execute against an existing order in the society book. This is useful if you would but like to pay maker fees.
TIF instructions allow y'all to specify the corporeality of fourth dimension that your orders will remain active earlier they are executed or expired. You can select one of these options for TIF instructions:
-
GTC (Skilful Till Cancel): The society will remain agile until it is either filled or canceled.
-
IOC (Immediate Or Cancel): The order will execute immediately (either fully or partially). If information technology is only partially executed, the unfilled portion of the club will be canceled.
-
FOK (Fill up Or Kill): The gild must exist fully filled immediately. If not, information technology won't be executed at all.
When you're in One-Way Mode, ticking Reduce-Only will ensure that new orders you set will only decrease, and never increase your currently open positions.
Liquidation happens when your Margin Balance falls below the required Maintenance Margin. The Margin Remainder is the balance of your Binance Futures business relationship, including your unrealized PnL (Profit and Loss). So, your profits and losses will cause the Margin Balance value to modify. If you lot're using Cross Margin way, this residual will be shared across all your positions. If you lot're using Isolated Margin fashion, this balance tin exist allocated to each individual position.
The Maintenance Margin is the minimum value you lot need to go along your positions open. It varies according to the size of your positions. Larger positions crave a higher Maintenance Margin.
You can check your current Margin Ratio in the bottom right corner. If your Margin Ratio reaches 100%, your positions will be liquidated.
When liquidation happens, all of your open orders are canceled. Ideally, you should keep track of your positions to avoid auto-liquidation, which comes with an additional fee. If your position is close to being liquidated, it may be benign to consider manually closing the position instead of waiting for the auto-liquidation.
When a trader'due south account size goes below 0, the Insurance Fund is used to cover the losses. Withal, in some exceptionally volatile market environments, the Insurance Fund may be unable to handle the losses, and open positions have to be reduced to cover them. This means that in times like these, your open up positions can too be at risk of being reduced.
The order of these position reductions is determined past a queue, where the about profitable and the highest leveraged traders are at the front of the queue. You lot tin cheque your current position in the queue by hovering over [ADL] in the [Positions tab].

Futures contracts are derivatives that requite traders the obligation to buy or sell an asset in the futurity. But unlike traditional futures contracts, perpetual futures contracts don't take a settlement appointment. Still, derivatives can be confusing for inexperienced traders, and so it'southward crucial to understand how these contracts work before taking financial risks. As mentioned, yous can admission the Binance Futures testnet to test out the platform without risking real funds.

Source: https://academy.binance.com/en/articles/the-ultimate-guide-to-trading-on-binance-futures
Posted by: morseintand.blogspot.com
0 Response to "when we leave the eu can i trade binary options"
Post a Comment